Block #2
For the second block we’re going to tackle some improvisational piecing. This means that rather than following a strict pattern, you’ll “wing it” and piece without following strict cutting sizes. If you’ve never done any improv. piecing before, it can seem daunting because it seems like the choices are limitless. However, doing it within the context of just one block, with a technique to follow, makes it completely manageable for your first try. Dive in and give it a shot. You can’t make mistakes with this type of piecing and every single block you make will be unique. Enjoy the process!


BLOCK NUMBERS FOR QUILTS:
Large Baby Quilt: 48” x 60”: make 20 blocks
Arrange in a 4 x 5 block grid
Lap Quilt: 60” x 72” make 30 blocks
Arrange in a 5 x 6 block grid
Queen Sized Quilt: 96” x 96” make 64 blocks
Arrange in an 8 x 8 block grid
FABRIC REQUIREMENTS FOR ONE BLOCK
One block finishes 12.5” square.
Fabric A (Kona Cotton Bone) 4” x 12.5” rectangle
Fabric B (Shot Cotton – Galvanized) 10” x 9” rectangle
Fabric C (Kona Cotton Butterscotch) 10” x 9” rectangle
Fabric D (Crossweave Blue Blue)10” x 9” rectangle
CUTTING
1. Working with fabrics B, C, and D cut out four rectangles of each color, all between 2” & 3” wide and 9” long. Do this at random and make sure you have variety in their widths.
Note: If you are making a whole quilt of this block, you’ll want to cut the strips of fabric B, C and D much longer than 9”. If you’re making lots of blocks, cut them the entire WOF (width of fabric) and just cut more as you need to. A rough estimate of how much fabric you’ll use is that you’ll need about a ¼ yard of fabrics B, C, and D for every four blocks you make.
2. Next, cut Fabric A into two 2” x 12.5” strips.

ASSEMBLING THE BLOCK
Always use a ¼” seam allowance while piecing.

1. Mix up the strips and assemble into four panels of three colors. Make sure that you have different strip widths in the panels and different variations in the color order.

2. Cut the panels into four strips of piecing.
Tip: I do this step without a ruler and that adds to the imperfect “wonky” look that I love. If you prefer straight lines, use your ruler. The more you do this sort of improv piecing the more you’ll get a sense of what you like and with time, you’ll develop your own look and style.
3. Now, start assembling the different strips into a panel. Then end goal is a 9.5” x 12.5” panel. You can really do this any way you’d like, but if you need a bit of guidance:

Start by sewing three together…

Then sew two more on to the side.
Keep growing your panel in this manner, checking its size on your cutting mat as you go so that you’re know you’re headed toward 9.5” x 12.5”.

Grow your panel until it is slightly larger than 9.5” x 12.5”. When I was finished with my panel, but hadn’t trimmed it to its correct size yet, it looked like this.
4. Trim your panel down to a perfect 9.5” x 12.5”.
5. Sew the 2” x 12.5” background fabric strips to either side of your panel and your block is complete!

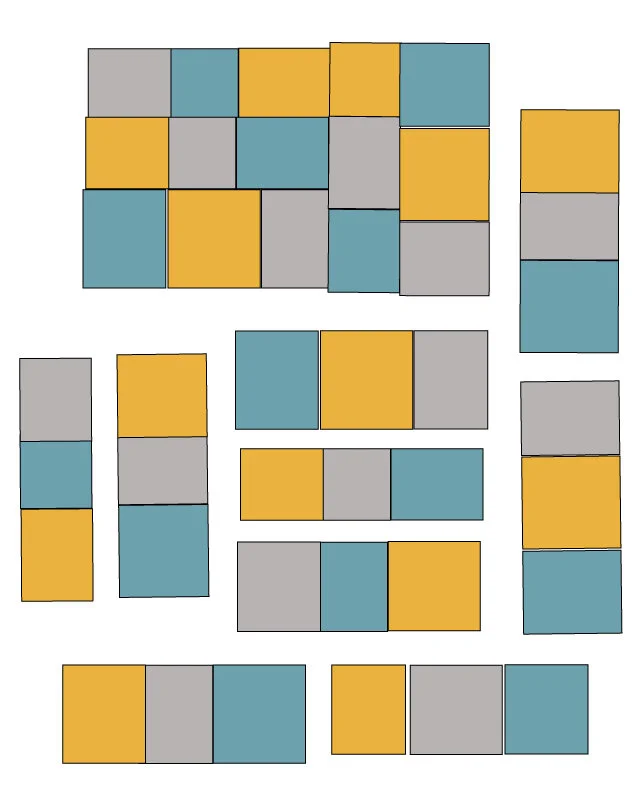
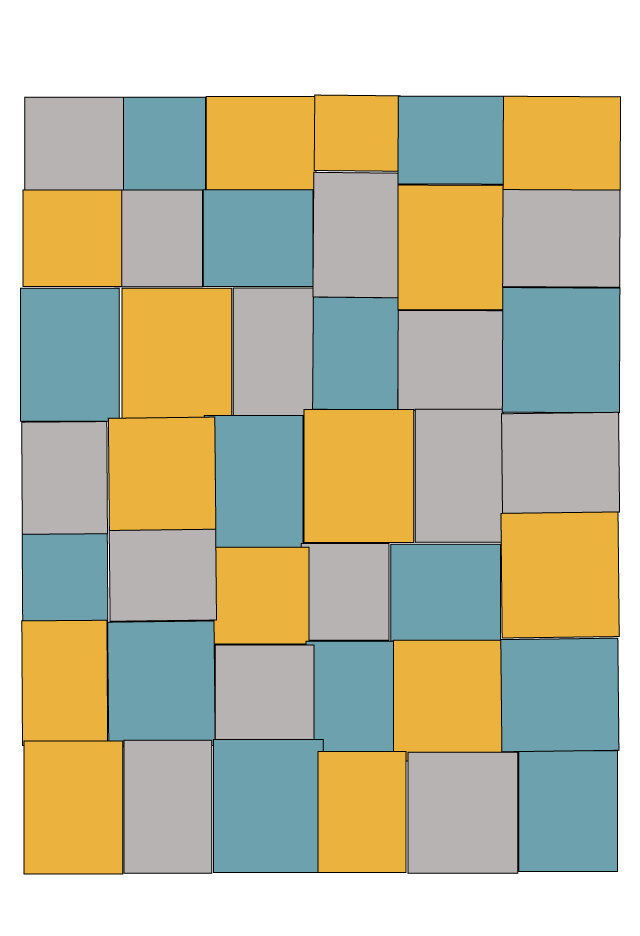
If you make 30 blocks like this the lay out options are limitless! I used a repeat of one block to create these digital quilts, but your blocks will all have unique improv pieced panels. Improv piecing keeps the design process going throughout the labor of making each block and can therefore make piecing truly enjoyable and freeing.
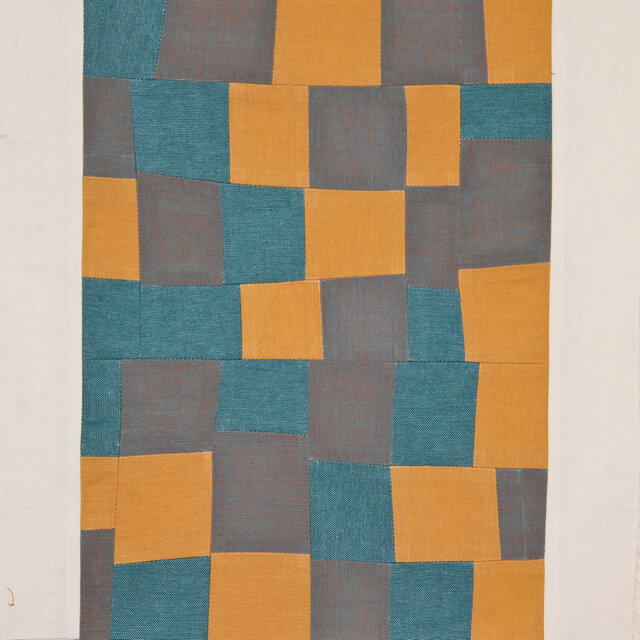

I also sewed the block up in completely different fabrics to show you how different it can look.

The fabrics I used are:
Fabric A, Kona Medium Gray
Fabric B, Cartwheel Lake ~ Summersault
Fabric C, Hugs and Kisses Candy ~ LouLouThi
Fabric D, Pearl Bracelet Green ~ 1001 Peeps

